Key Takeaways
- Apple Maps provides elevation info for walking routes, showing ascents, descents, and route steepness.
- Elevation graphics are available on iPhone/iPad, Mac, and Apple Watch for navigating walking routes.
- Elevation info for major cities is also accessible on Apple Maps, but feature availability varies.
When you’re driving from A to B, the steepness of the route doesn’t matter much, as your car is doing all the work. However, if you’re walking, it would be really useful to know just how much climbing there’s going to be, or whether there will be any steep descents that will be hard on your knees.
Apple Maps provides elevation information for walking routes that can give you an indication of how much you’ll need to ascend and descend on your route, as well as a visual representation of the steepness or gradual nature of those ascents and descents.
1:04

How to easily find and check your elevation on Google Maps
You can quickly see how high you are from anywhere – just open Google Maps to check out your elevation. Here’s how, step by step.
You can also find information about the elevation of major cities around the world in the Apple Maps app. However, the information isn’t available for all cities; it’s a bit hit or miss regarding which cities have elevation information and which don’t. Here’s how to find elevation in Apple Maps.
How to find the elevation for walking routes in Apple Maps
iPhone and iPad
iPad
, you can view a graphic that displays how the elevation of your route changes throughout the journey. This enables you to see if there are any steep climbs or descents along your route. The graphic also indicates the total amount you’ll ascend and descend during your walk.
If multiple route options are available, you can view the elevation graphic for each route, allowing you to select one with more or less ascent depending on the challenge level you desire for your walk.
- Open Maps on your iPhone or iPad.
- Enter your destination in the Search Maps field.
- Tap the Car icon.
- Select the Walking directions.
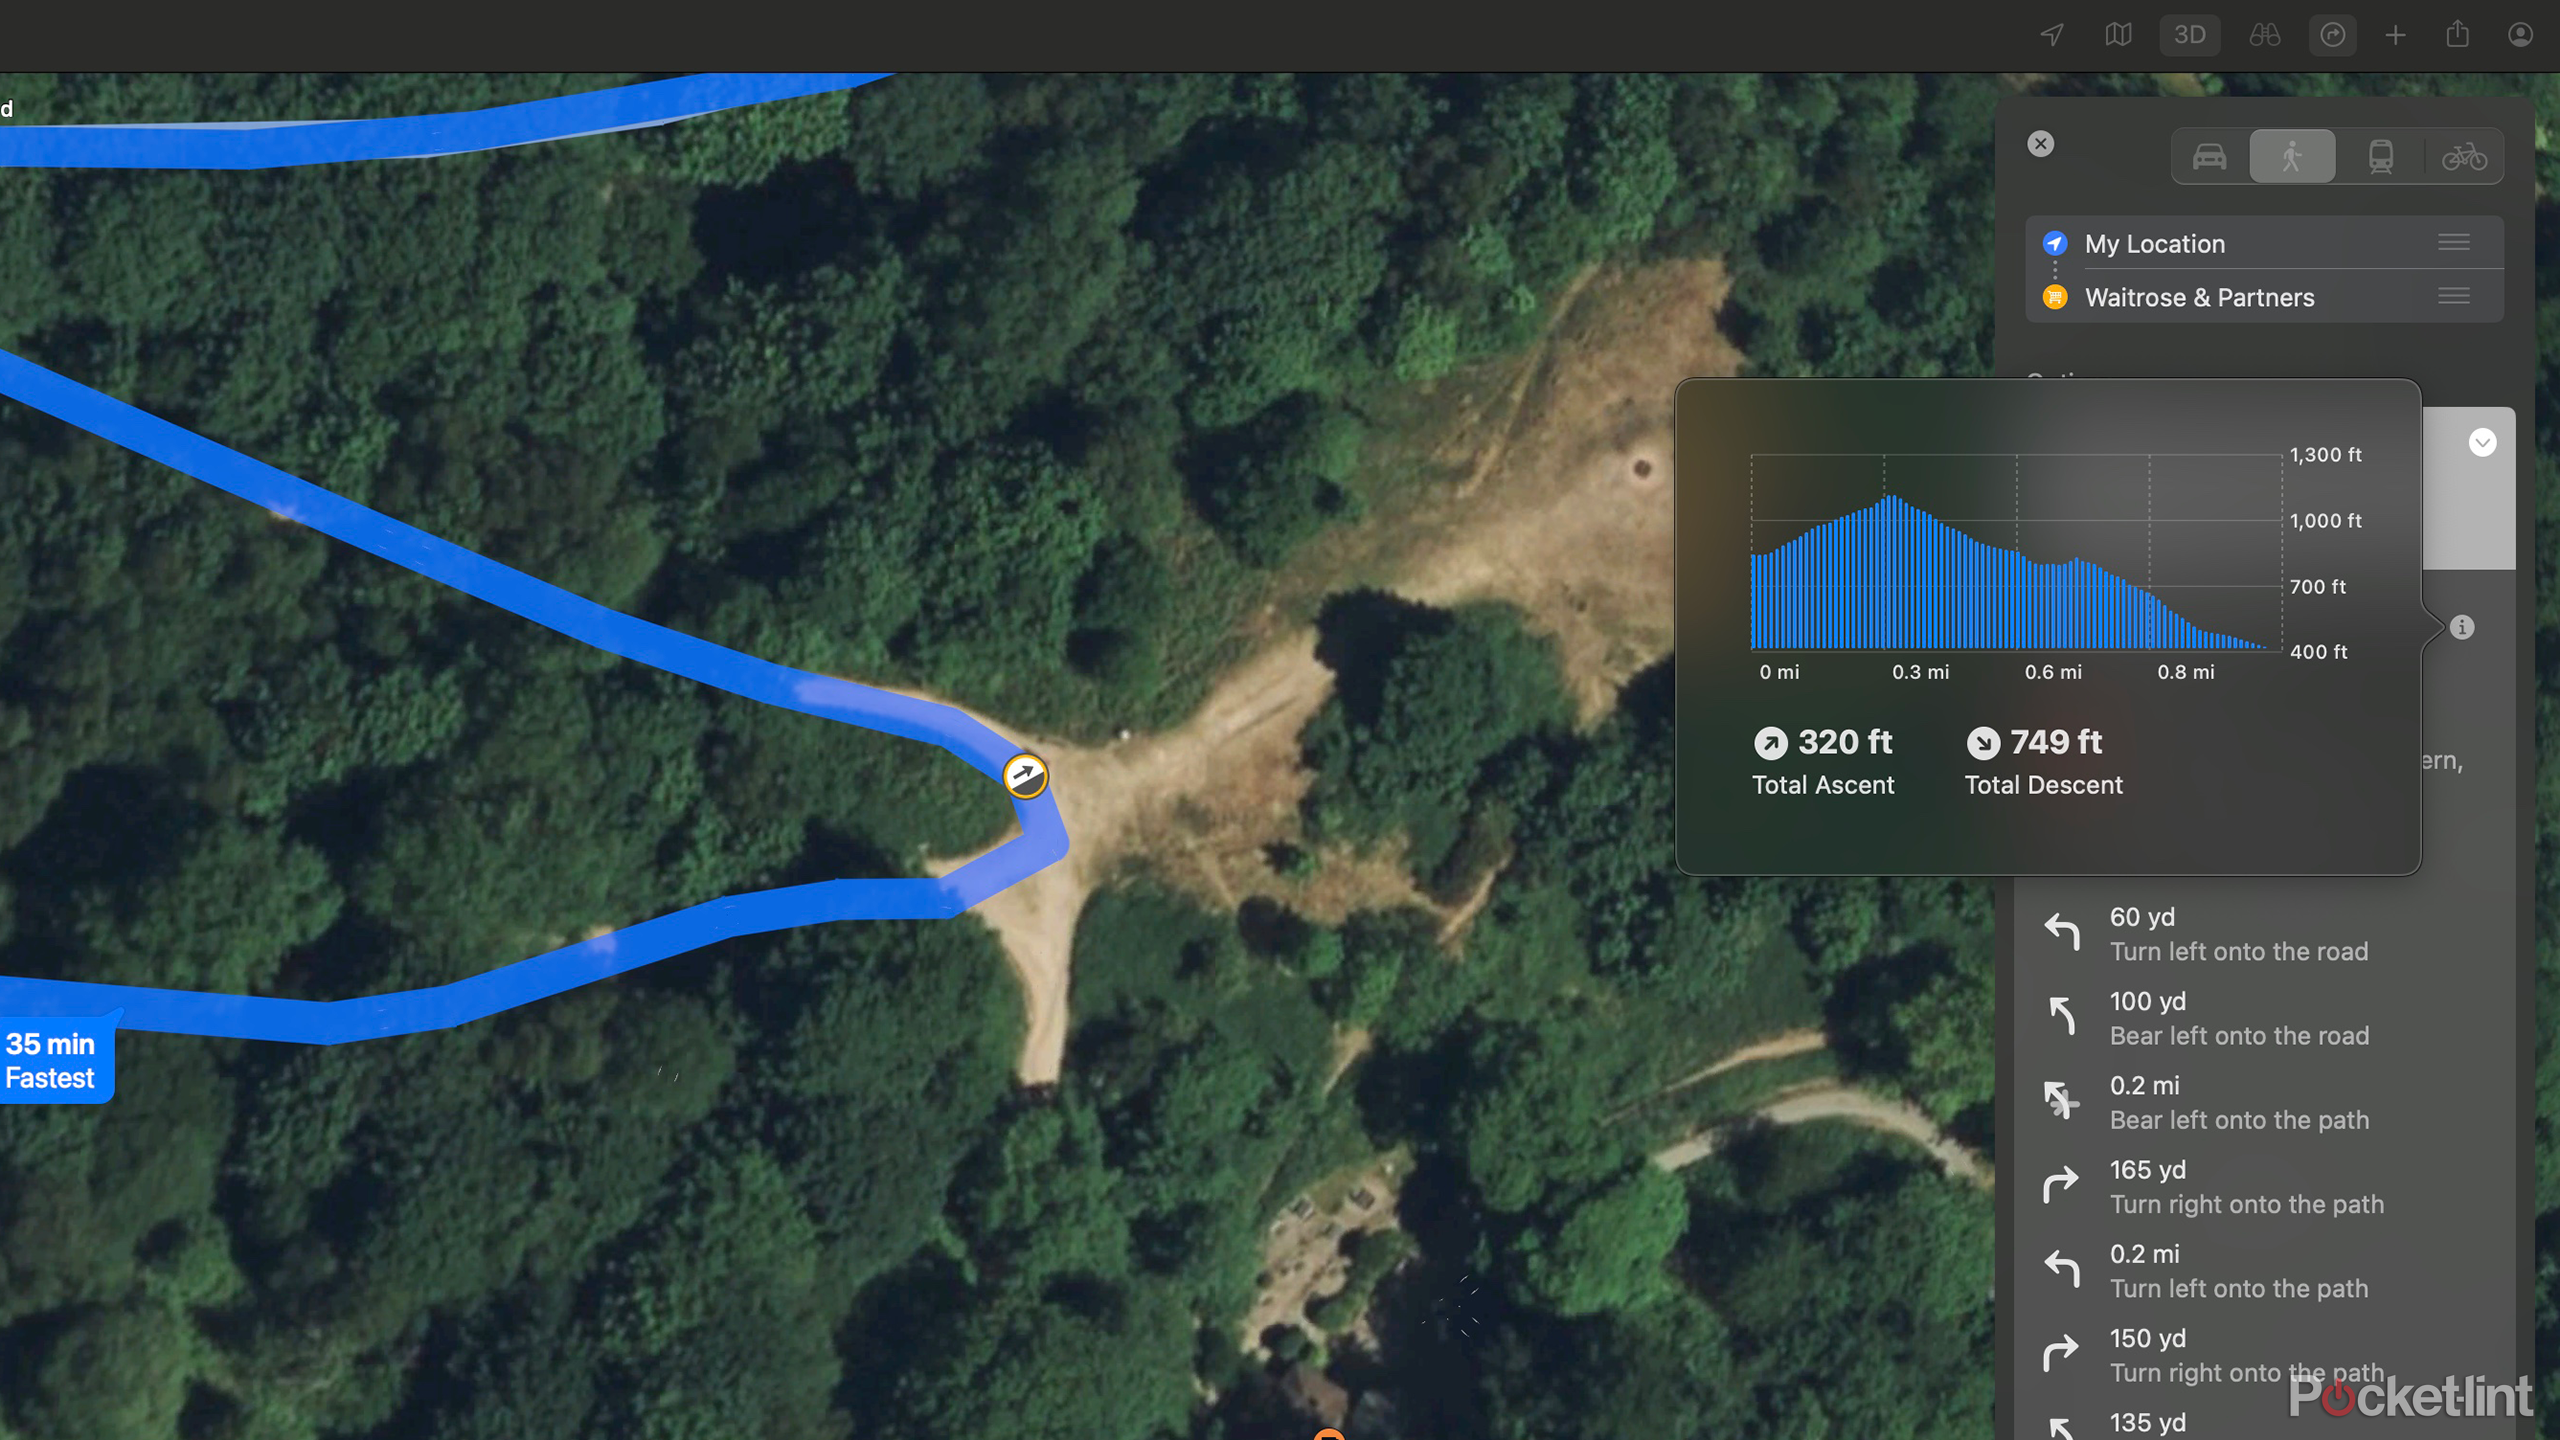
- You’ll see route options, which include a graphic showing the changing elevation and the total distance you have to climb on the route.
- Tap the graphic to see a detailed view of the changing elevation.
- In addition to bars showing the elevation along your route, you’ll also see the total ascent and descent for your route.
- Tap Go for the route you want to use and follow the directions.
Mac
If you’re using Apple Maps on your Mac, you can also see a graphic showing the changing elevation over the course of your route when you opt for walking directions. Just as on the iPhone and iPad, there’s a basic graphic showing the overall change in elevation, as well as a more detailed graphic that includes an elevation scale and information on the total ascent and descent.
- Open Maps on your Mac.
- In the search bar in the top-left of the screen, enter the location you want to navigate to.
- You can also select a starting location if it’s different from your current location.
- Click the Walking icon.
- You’ll see route options, each of which will have a graphic showing how the elevation changes throughout the journey.
- Click the small arrow next to one of the options.
- Beneath the graphic, you’ll see the totals for ascent and descent.
- Click the i icon next to these figures to see a more detailed graphic that shows your elevation throughout the journey, including a vertical scale for the elevation.
- You can use these graphics to choose a set of directions that are most suitable, whether you want a gentler walk or a more challenging one.
Apple Watch
Maps is also available on your Apple Watch, and it’s a really useful way to navigate, with haptic feedback on your wrist telling you when to turn left or right, so you can leave your iPhone in your pocket. You can also see a graphic showing the change in elevation for your journey, although it’s not quite as detailed as on an iPhone or Mac.
- Open Maps on your Apple Watch.
- Tap the Search icon.
- Tap the Search field and enter a destination using Scribble or tap the Microphone icon to dictate your destination.
- Tap Done and select the destination from the search results.
- Tap the blue directions icon.
- In the top-right of the screen, tap the Car icon and select the Walking icon.
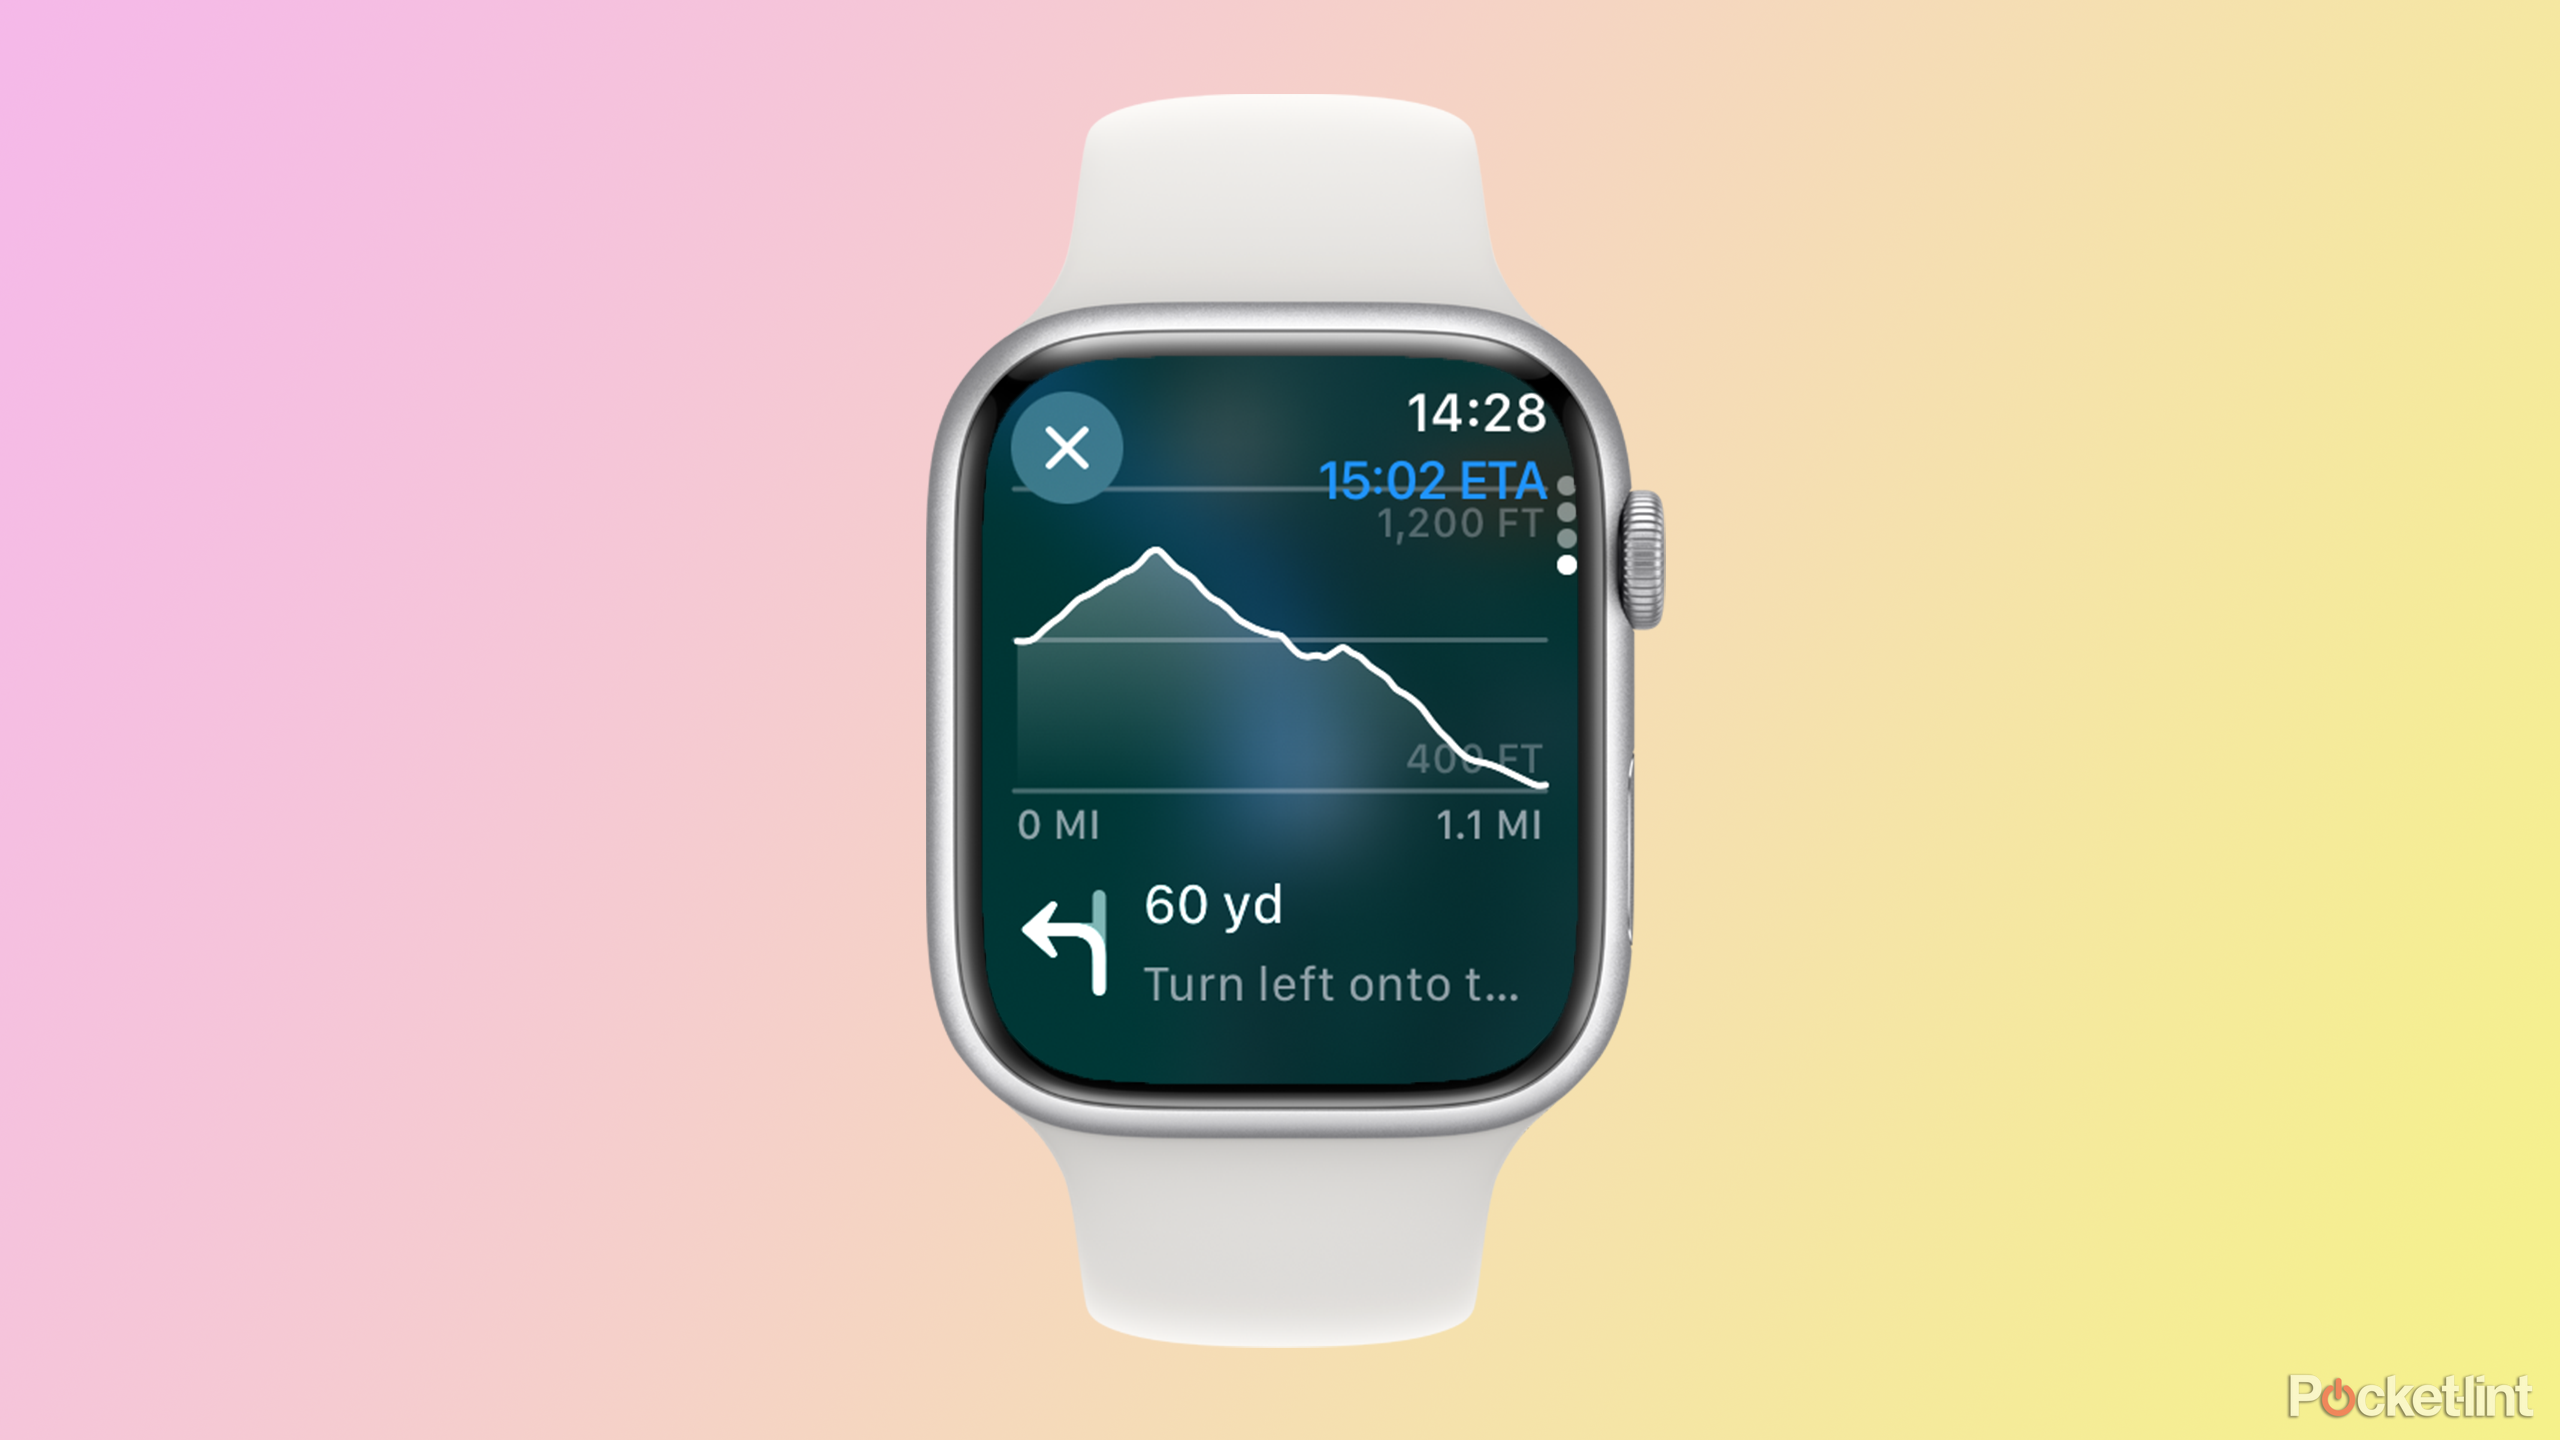
- You’ll see a route option on your Apple Watch, with a graphic showing the elevation and the total climb.
- Swipe up or rotate the digital crown to see alternative routes.
- Tap the i icon to see more details about the route, including total ascent and descent.
- Swipe up or rotate the digital crown to see a more detailed graphic of the changing elevation over the route.

How to quickly find your parked car with Apple Maps on iPhone
Apple’s parked car feature can be a real lifesaver when you’re new to a city or unfamiliar with an area. Here’s how to turn it on and use it.
How to find the elevation of major cities in Apple Maps
iPhone and iPad
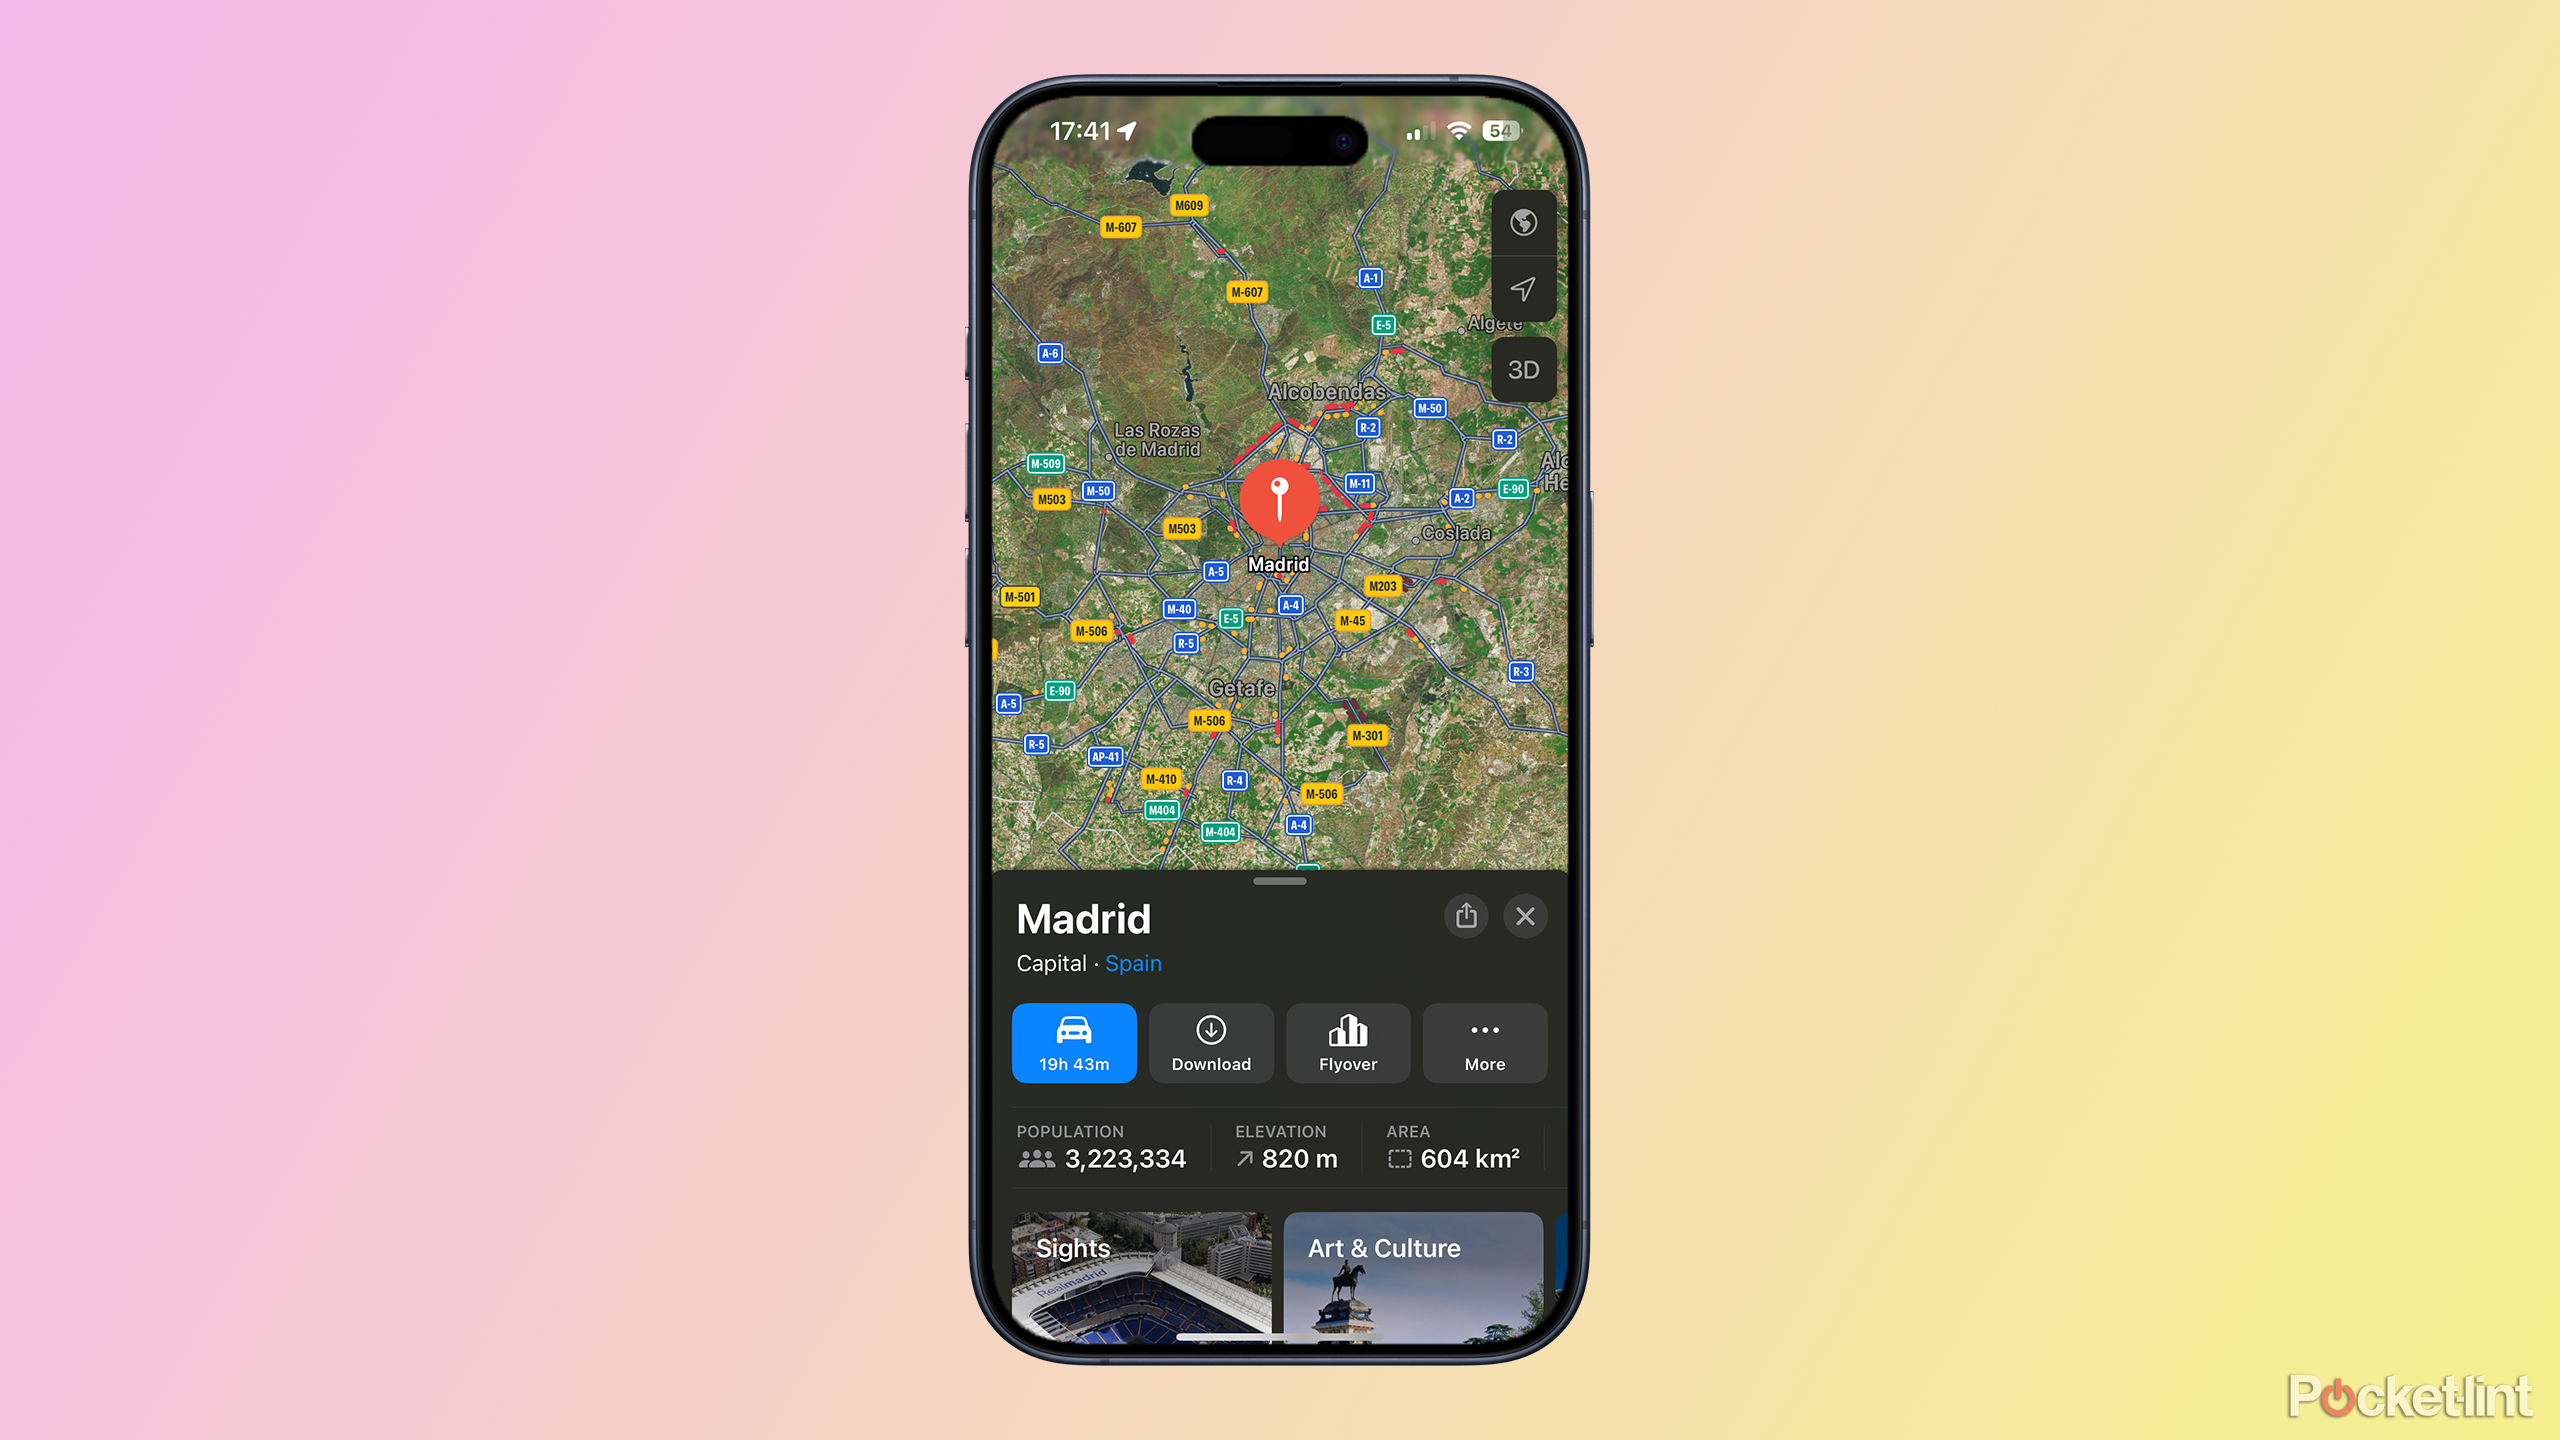
If you want to know the elevation of specific locations, it’s possible to do so in Maps on iPad and iPhone, but only for a limited number of locations. You can find elevation information for many major cities, although some larger cities are missing this information.
- Open Maps.
- Type the name of a city in the search field.
- Select the relevant city in the search results.
- For some cities, you’ll see information on the population, elevation, area, and distance of the city beneath the navigation button.
- If you can’t see this information, then it isn’t available for that location.
Mac
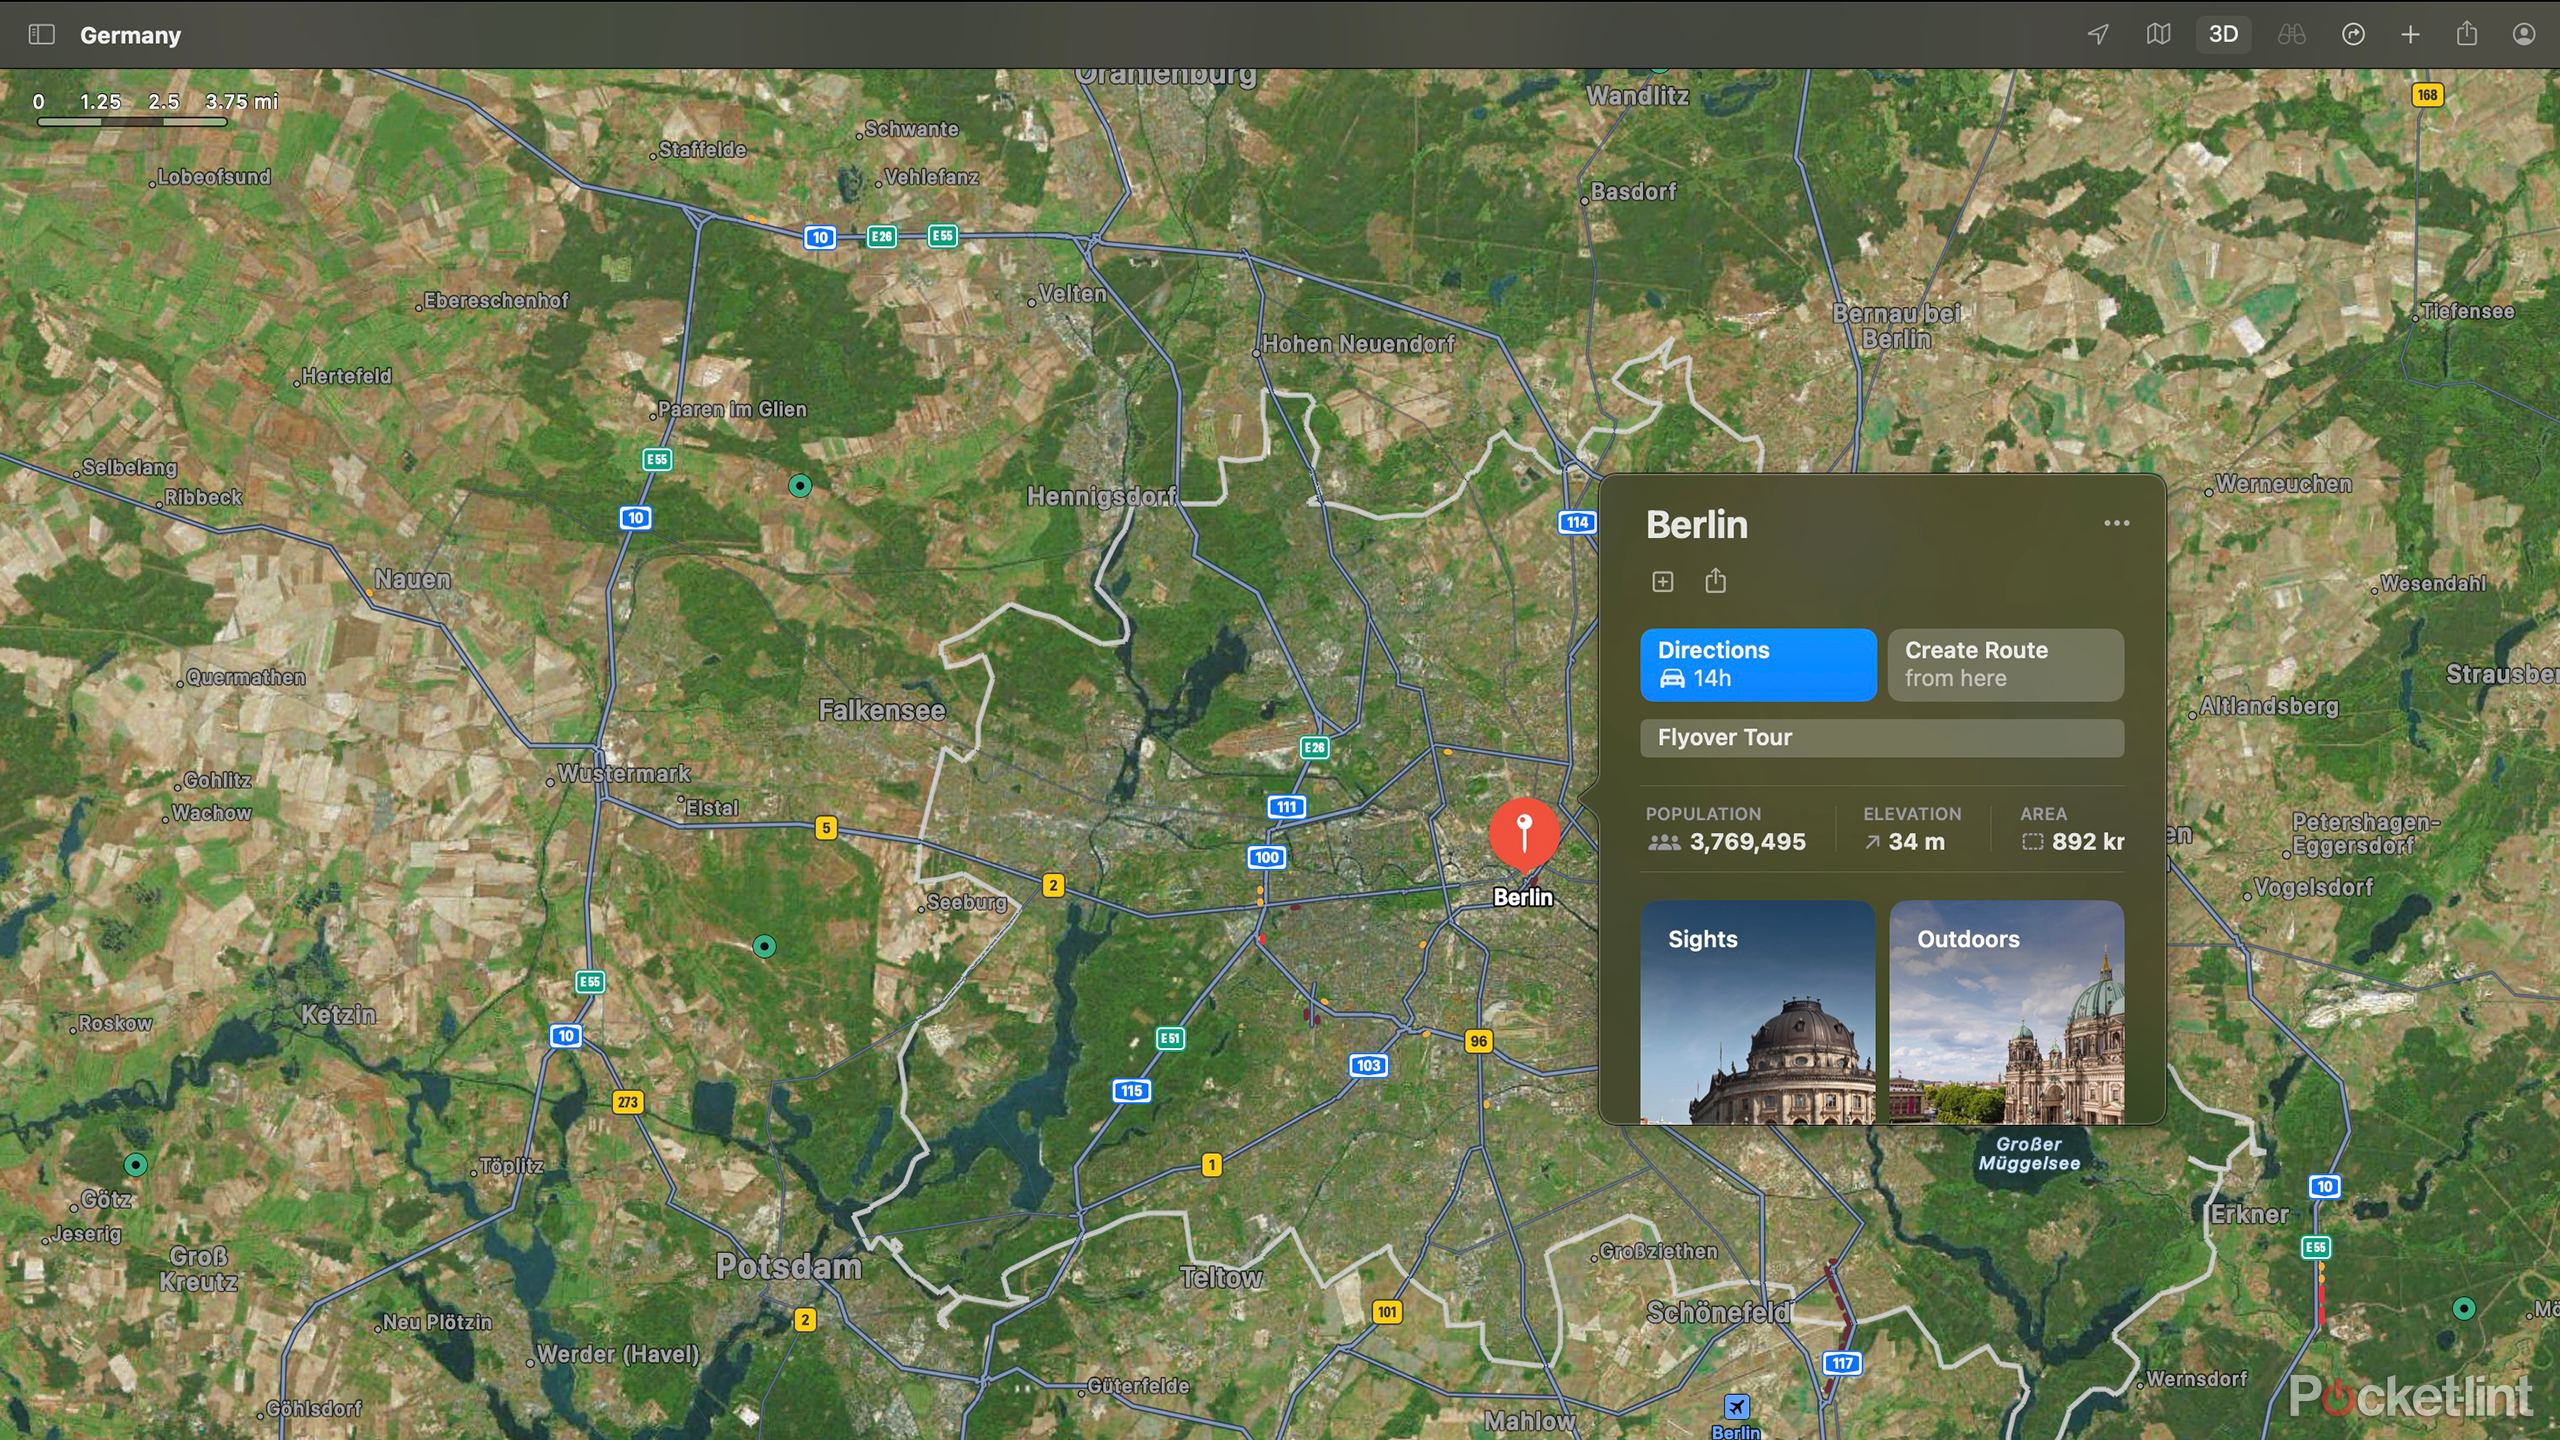
You can also see elevation information for the same locations in the Maps app on your Mac. As with the Maps on the iPhone, if you don’t see the information then it isn’t available for that location.
- Open Maps and type the name of a city in the Search field.
- Click the appropriate city from the results.
- In the main screen, you’ll see information about the city, including population, elevation, area, and distance.
- If you can’t see this information, it’s not available for that location.
Apple Watch
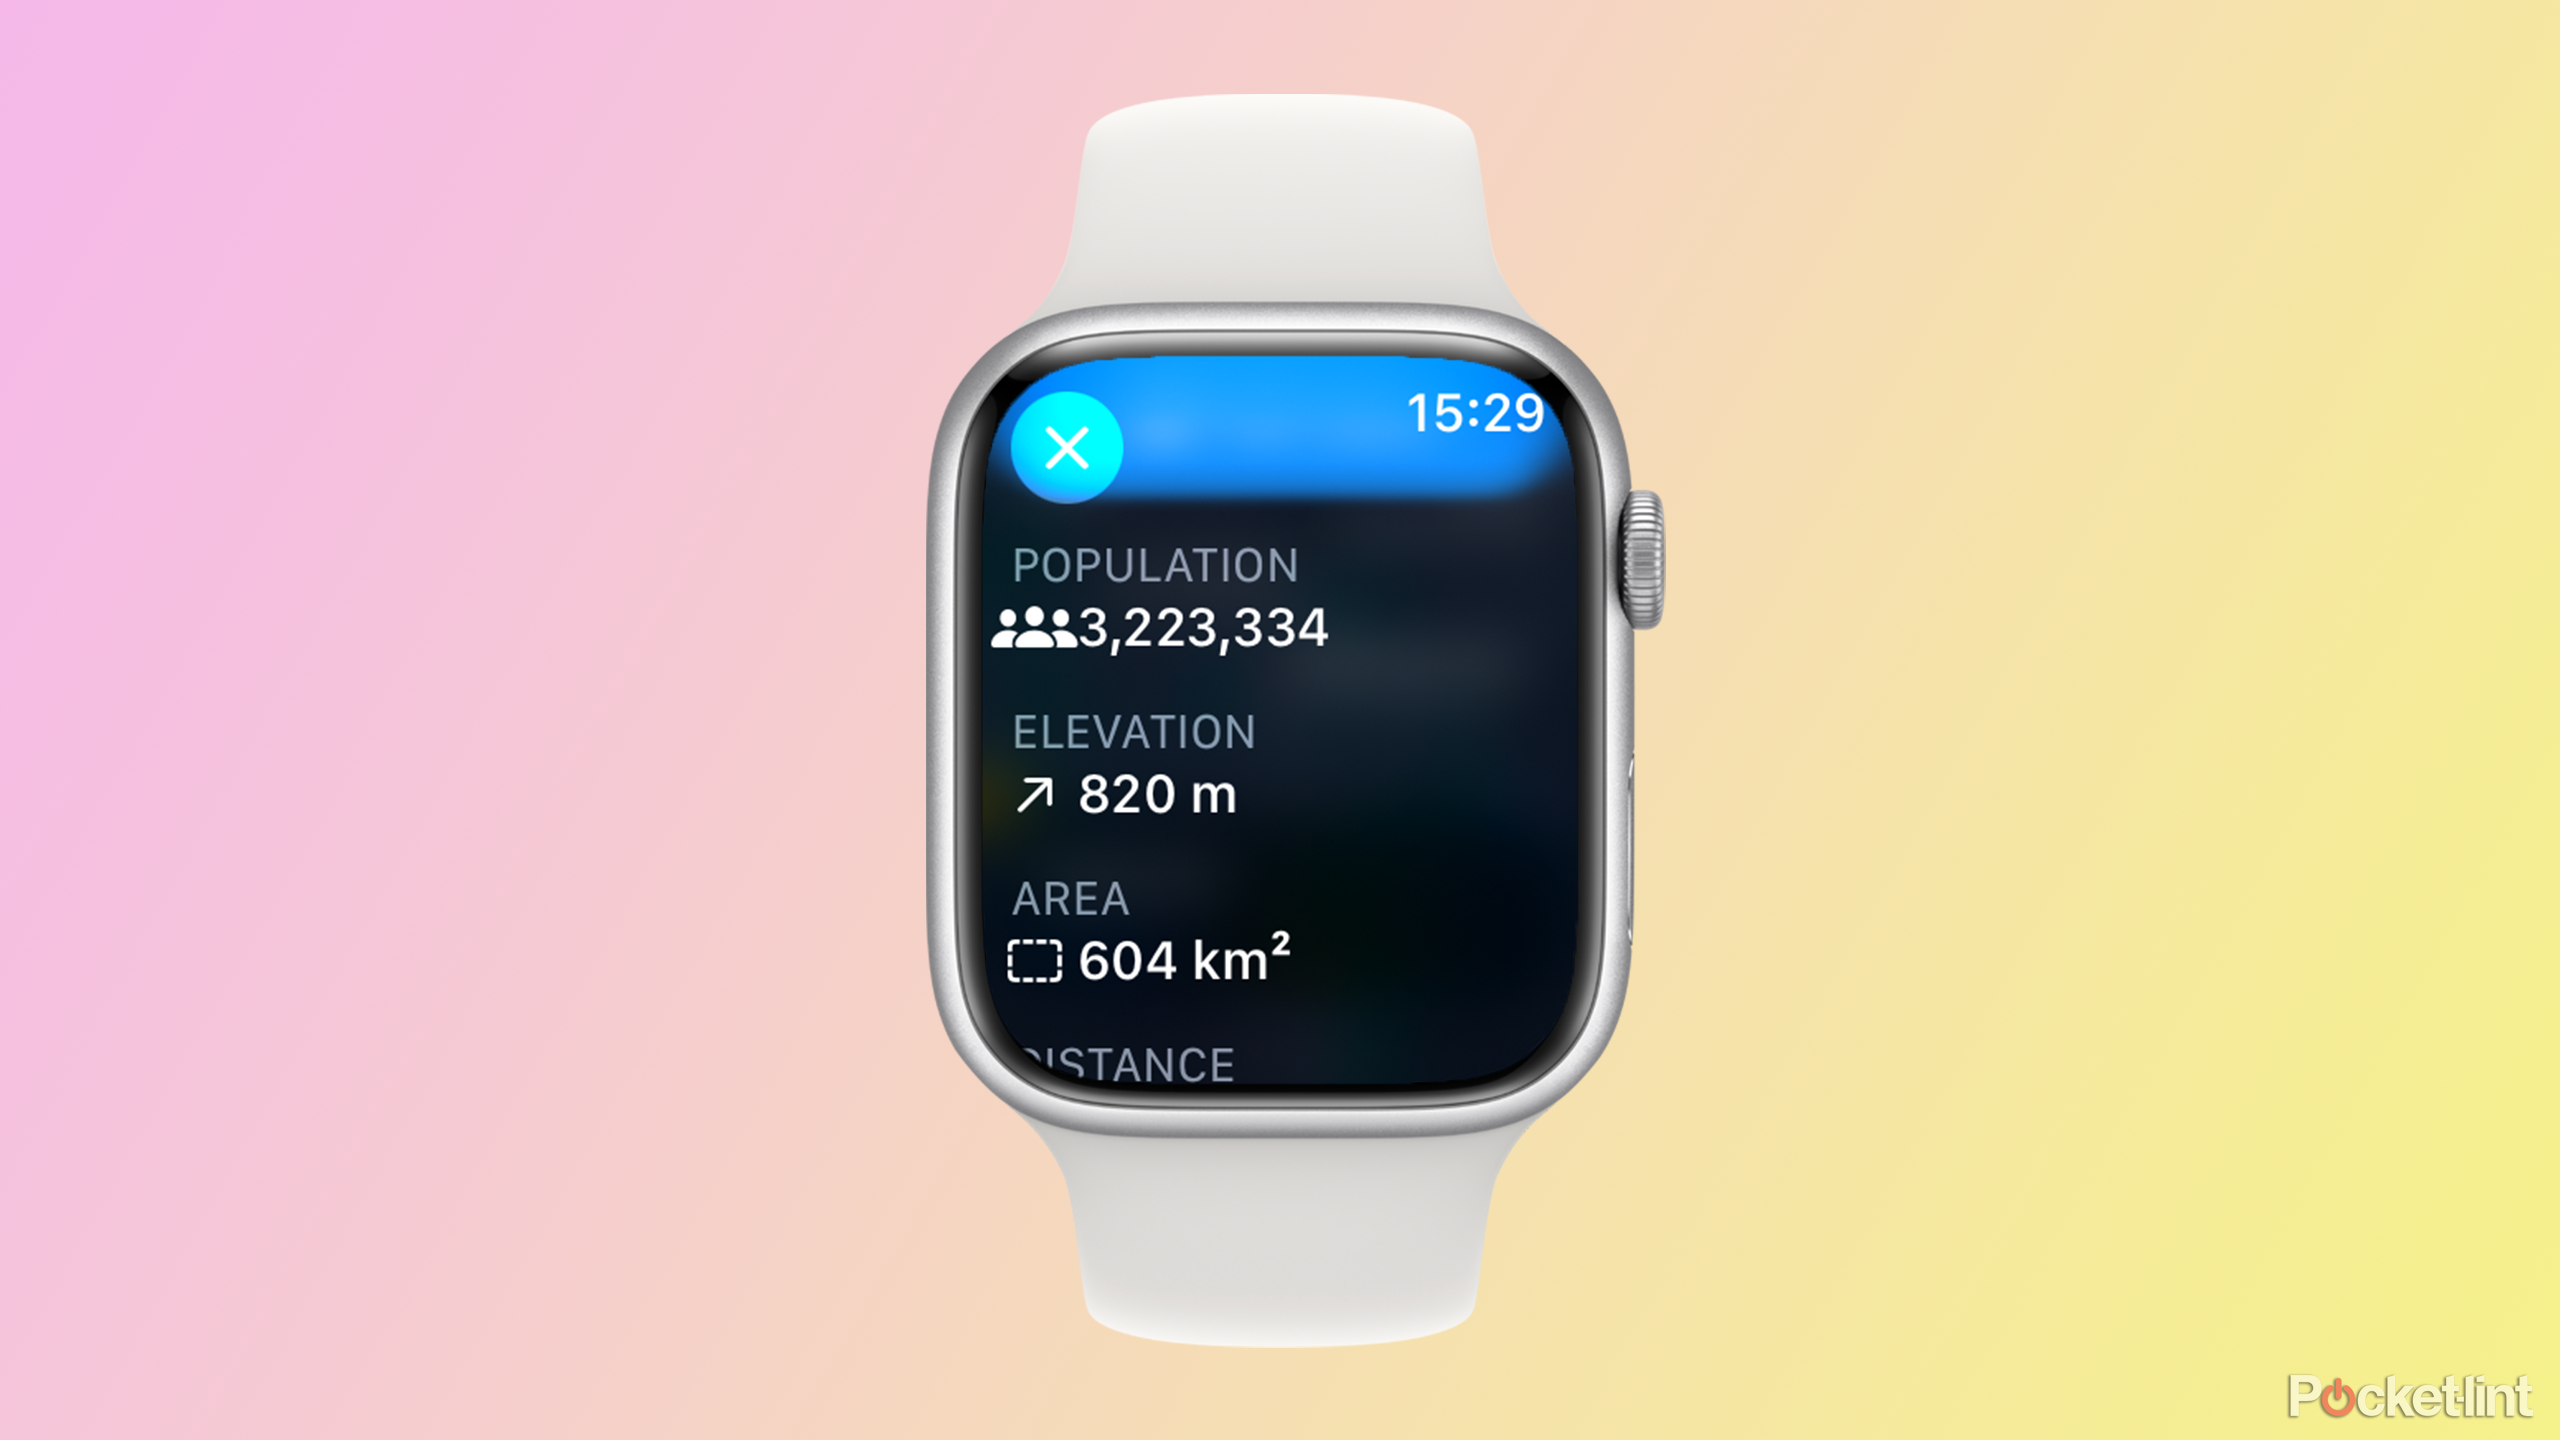
The same elevation information for certain cities can also be found in the Maps app on Apple Watch.
- Open Maps and tap the Search icon.
- Enter the name of the city you want to search for.
- Select the relevant city from the search results.
- Swipe up or rotate the digital crown to see information on the population, elevation, area, and distance of the city.
- If you can’t see this information, it’s not available for that location.
Apple Maps tips and tricks: 14 useful things to get the most out of maps
Here are 14 tips and tricks to help you get the most out of Apple Maps.

FAQ
Q: Which cities have elevation information in Apple Maps?
There’s no clear information on which locations have elevation information and which don’t, but the feature is limited to larger cities. Many of the cities that have elevation information also support the Flyover and Augmented Reality Walking Directions features, but there are some cities that have one of these features but don’t show any elevation information.
If you’re looking for a specific city, you may get lucky or you may not. For example, Madrid has elevation information, but Barcelona doesn’t.
Q: Which Apple devices support enhanced details in Apple Maps?
Elevation information is part of the enhanced details feature in Maps. You may not be able to access enhanced details on older iPhones and iPads, or Macs with Intel chips. The full list of supported devices is as follows:
- iPhone XR
- iPhone XS
- iPhone XS Max
- All iPhone 11 models
- All iPhone 12 models
- All iPhone 13 models
- All iPhone 14 models
- All iPhone 15 models
- iPhone SE (second gen or later)
- iPad mini (5th generation or later)
- iPad (8th generation or later)
- iPad Air (3rd generation or later)
- iPad Pro 11-inch (all generations)
- iPad pro 12.9-inch (3rd generation or later)
Q: Can I see my current elevation in Apple Maps?
It’s not possible to see your current elevation in Maps, but you can quickly see your current elevation using the Compass app on your iPhone. This is one of the Apple apps that comes pre-installed on your iPhone. Open the Compass app and you’ll see your current elevation at the bottom of the screen.


