Staying safe online is harder than it should be, and the labyrinth of menus upon menus upon menus buried deep within nesting settings menus is largely to blame.
Whether you’ve just bought a new iPhone and need a hand going through all the settings or you’ve just decided it’s about time to go through your current iPhone, these changes in your settings menu are free and take only 10 minutes (or less).
For more apps that can beef up your security, check out Best VPNs and our Guide to Password Managers once you’re done adjusting the settings on your iPhone.
These directions are for Apple iPhones running iOS 18.4. When Apple updates iOS and changes the privacy and security menus, we’ll update this guide.
change is good
I’m only highlighting the changes within Settings that’ll improve the privacy and security of your iPhone’s iOS operating system. There are more settings in there to do things such as set a default payment card for mass transit or save your shipping address for faster checkout when buying something.
That’s all great stuff to check out, but I’m going to let you handle that on your own time. We’ve got enough to cover as it is by just focusing on privacy and security.
All the magic will happen in your iPhone’s Settings app. Other apps, such as your browser and Apple Wallet, have their own privacy settings, and you’ll have to go through those on each app independently. The settings we change here in Settings (mostly) won’t carry over to them. I go through the settings every time I download a new app.
More often than not, there are all sorts of sketchy opt-outs for sharing analytic data and personal tracking. I’ve even had a calorie counting app want access to my location at all times. Bleh. Turn all that stuff off in every app.
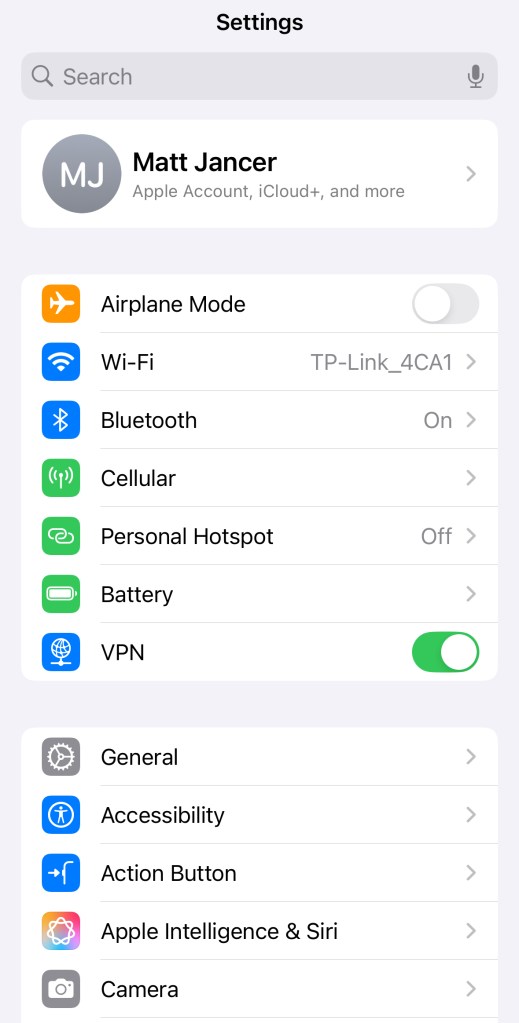
your apple account settings
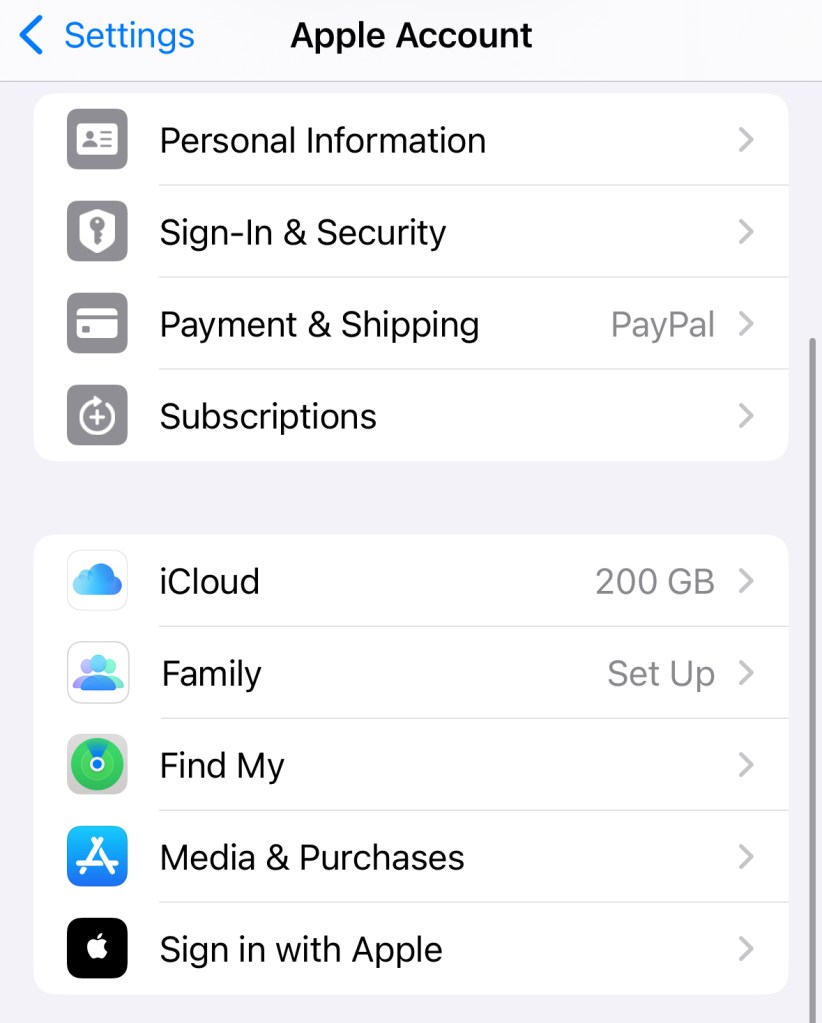
Right under the search bar is your account. It’ll say “(Your Name),” followed by “Apple Account, iCloud+, and more” in smaller type. Click that. Then click Sign-In & Security. Under Recovery Contacts you can set up a trusted friend or family member as a backup way to regain access to your Apple account if you get locked here. Set that up, if you like.
Then go back to Sign-In & Security and click Recovery Key. Generate one, and save it someplace safe. That’s what you can use to regain access, too. Just don’t lose it or store it within your Apple account itself somewhere.
At the bottom of the Sign-In & Security screen, there’s Automatic Verification. As Apple puts it, this allows you to “bypass CAPTCHAs in apps and on the web by allowing iCloud to automatically and privately verify your device and account.” Selecting it doesn’t exactly boost your security, but I toggle it on. iCloud is secure enough—and these pedestrian CAPTCHAs too flimsy to do much—that I feel secure enough using it.
Back up one screen to Apple Account. Click iCloud. Scroll down to Advanced Data Protection, and set that up. This encrypts your iCloud data (Messages’ history, Photos, Voice Memos, etc.) so that snoops and hackers are a lot less likely to get ahold of it and read it. It’ll walk you through setup.
You may as well also navigate to iCloud Backup after this is done and toggle Back Up This iPhone. That way your data is safe even if you fumble your iPhone into an active volcano… or just down the stairs. Leave Back Up Over Cellular off, though. It’ll eat up all your cellular data.
Back in Apple Account, go to Find My. Turning on Find My iPhone is a good idea, so do that. Turning on Share My Location is your call. It lets your chosen friends and family see the live location of your device (and ostensibly you) on their own Apple devices or web browser. I leave it off. My friends don’t need to know where I am at every moment.
Lastly, at the bottom of the Apple Account screen, there’s Contact Key Verification. This decreases the chances that you end up chatting with somebody lying about their identity, a common and growing scam.
But it’s unwieldy to use in practice. It’s your call. You may find it too much of a pain in the ass that irritates your friends and family to continue using.
general tips for the general tab
Ok, now we’re getting out of the Apple Account screen. I’m sure you’re sick of it, too. Back in the main Settings screen, go to Personal Hotspot. Deselecting Allow Others to Join lessens the chances somebody in public will try to illicitly piggyback off your hotspot.
It’s not a huge concern, though, since they’d still need your Wi-Fi password (which is displayed below the toggle switch) to join. If you leave it off, you can still join your other devices to your hotspot, as long as they’re both logged into yosecur iCloud account.
Back in the main Settings menu, do you see VPN underneath Battery? Leave that alone, unless you use a VPN (virtual private network). You should, anyway. Here’s a guide to the best. Using one will significantly boost your privacy.
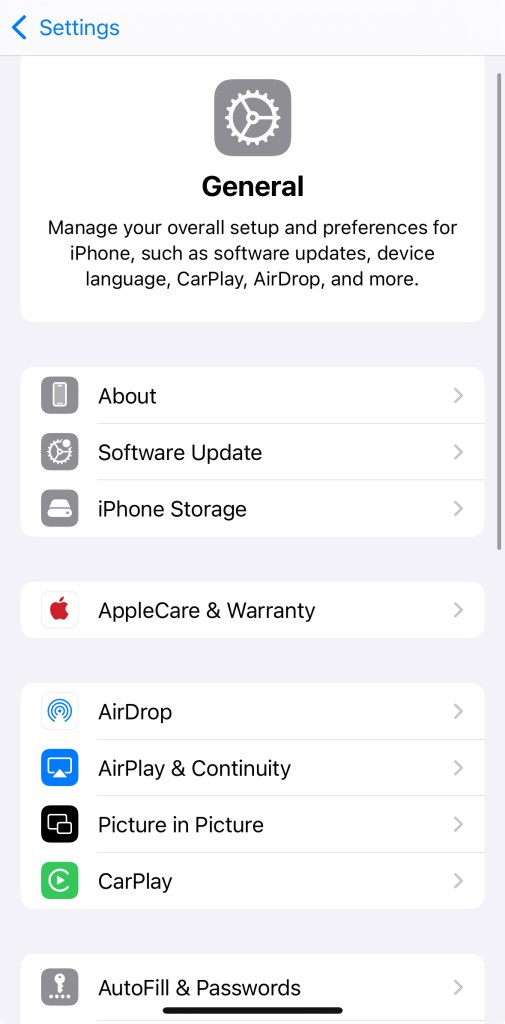
Back up to Settings, and go to General. Click Software Update. Set Automatic Updates on. Back up and go into AirDrop. Public, unwanted AirDrops were enough of a nuisance that Apple tweaked things a while ago to allow for only three selections: Receiving Off, Contacts Only, and Everyone for 10 Minutes.
There’s no longer a way to leave it open to every perverted weirdo in public and accidentally forget about it. Unless you have the most annoying and untrustworthy people in your Contacts, it doesn’t much matter whether you select Receiving Off or Contacts Only.
Back in General, click AutoFill & Passwords. It’s fine to toggle this on. It sure makes navigating apps and the web browser easier. You can use passwords you’ve saved to Apple’s default Passwords app, or you can use one of the password managers I recommend, such as Dashlane.
Before you leave this screen, scroll down to Verification Codes and toggle Delete After Use on. It deletes those two-factor verification texts that websites like to send out for secure access.
Back in General, you can access your VPN—if you’re using one—under VPN & Device Management and verify that it’s currently on. If you don’t use one, this will be grayed out.
the last few privacy settings
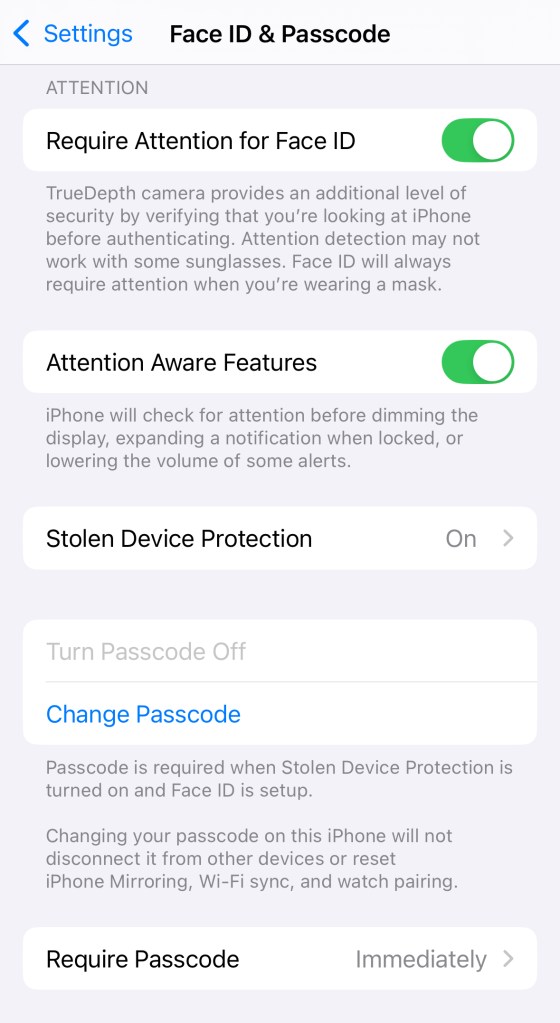
All the way back in the Settings screen, you can skip past a bunch of rows until you come to Face ID & Passcode. Click that. Here you can set up Face ID. I find it secure and useful enough that I enable it. Once you’re done setting that up, scroll down to Require Attention for Face ID and toggle that on.
Then go down to Stolen Device Protection. Within this screen, toggle it on, and under Require Security Delay, toggle Away from Familiar Locations.
Before you leave Face ID & Passcode, go all the way to the bottom. You’ll see something scarily titled Erase Data. If you toggle it on, it’ll erase everything on your iPhone if somebody enters the wrong passcode on the lock screen 10 times in a row.
After a drunk friend thought it’d be funny to snatch my phone and enter the wrong passcode nine times in a row, I’ve turned this off. There are other ways out there to lock down your iPhone if it’s lost or stolen. But if you’re very confident in your backups (and the sobriety of your friends), you can enable this at your own risk.
Back in Settings, go to Emergency SOS. This section has a good spread of explanations for what each selection does. Go ahead and enable all of them: Call With Hold and Release, Call with 5 Button Presses, Call Quietly, and Call After Severe Crash. Then set your emergency contacts.
Back up a screen and then click Privacy & Security. Aha! Such an obviously named menu, you’ll wonder why they don’t just lump all of this stuff under this screen. Under Location Services, you should leave it enabled, otherwise things like map app navigation won’t work for you.
There’s also a full list of the apps you have installed. For each one, it shows whether that app is allowed access to your phone’s location or not. You can go into them if you like. Leave location enabled for the ones that make sense, like Maps. For apps where it makes little sense, like Venmo, turn it off.
Go back to Privacy & Security, click Tracking, and then make sure Allow Apps to Request to Track is off. Now back out of that screen again. Most of the rest of these tabs are fodder for micromanagers, but you can leave them alone to save your sanity. They just show which apps have permissions for which phone functions.
Safety Check lets you manage who has access to your device. Most people won’t have others set to share access to their device, though, so odds are that if you’re unfamiliar with this tab, it doesn’t apply to you.
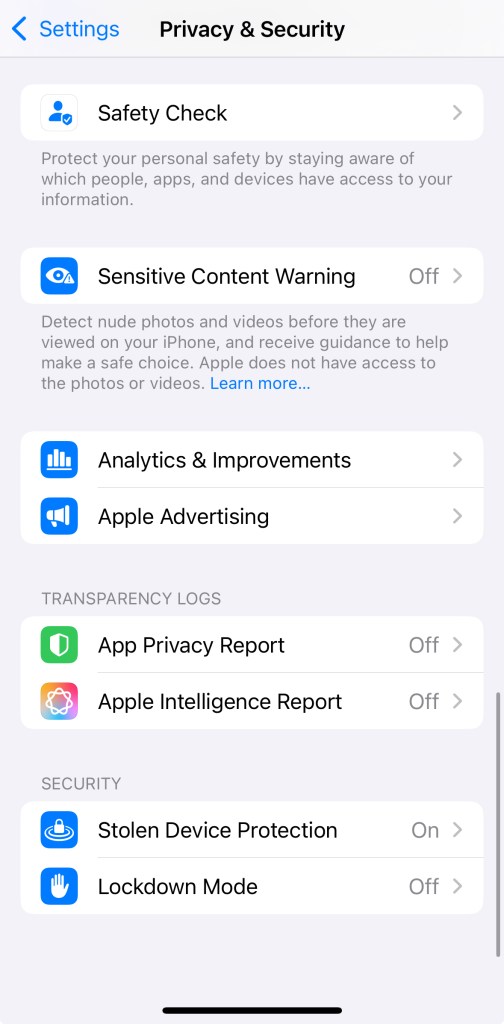
Sensitive Content Warning is self-explanatory. It’s less of a safety thing and more of a “I want my iPhone to step in so that I don’t see genitalia” thing. Now go to Analytics & Improvements. Deselect every option here. All of ’em. Back out, go to Apple Advertising, and deselect that, too.
You’re almost done. Back up a screen. Under Transparency Logs, there are two options: App Privacy Report and Apple Intelligence Report. The first is mostly to satisfy your curiosity of which apps are using the permissions you grant them. I don’t find it necessary to enable it.
The latter is for if you’ve enabled Apple Intelligence on your phone. Turn Apple Intelligence Reports off. Back out to the Settings screen for one more tweak under Wallet & Apple Pay. Go to Apple Intelligence, and then deselect Learn from this App. I don’t want Apple snooping on what I pay for and then sharing that data across apps.
That’s it. Now go pour yourself a drink of your choice and relax. From time to time when Apple releases updates to iOS, these settings menus change. At the very least, every time the iOS version bumps up a whole number (say, from 18.5 to 19.0), go back through the settings to make sure nothing has been added or re-enabled. But for now, you can breathe easily.
Since you’re all set with the privacy and safety settings on your iPhone, go check out the Best VPNs and our Guide to Password Managers.


